
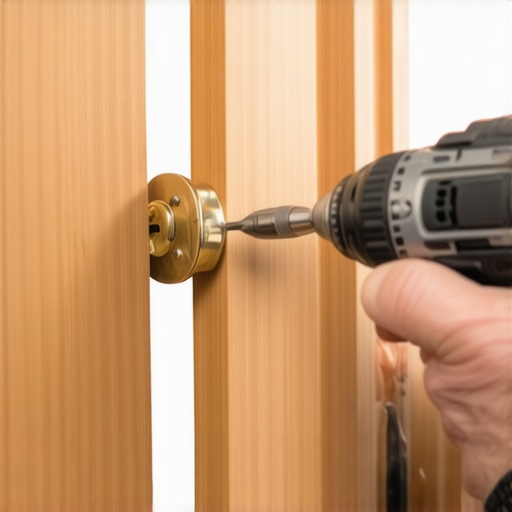
I teach my apprentices that if you have to force the key, you’ve already lost. That same philosophy applies to the door itself. Over twenty-five years at the bench has taught me that most homeowners, and frankly most ‘handymen,’ approach door security with the finesse of a sledgehammer. They buy a piece of zinc garbage from a big-box store, grab a dull hole saw, and proceed to turn their expensive oak door into a pile of splinters and regret. I have spent countless hours in urban areas fixing the aftermath of botched DIY jobs where the frame was so mangled it couldn’t hold a strike plate, let alone a determined intruder. If you want to install a deadbolt that actually works without compromising the structural integrity of your home, you need to understand the physics of the door frame and the precise mechanics of the hardware.
The Anatomy of a Failure: Why Frames Splinter
Most people think a deadbolt is strong because the bolt is thick. That is a partial truth. A deadbolt is only as strong as the wood it is anchored into. When you drill a 2-1/8 inch hole into a door, you are removing a significant portion of its vertical stability. If your alignment is off by even a sixteenth of an inch, the bolt will bind against the strike plate. This binding creates friction. Over time, that friction wears down the brass pins inside the cylinder and puts lateral pressure on the wood grain of the jamb. Eventually, the wood splits. This is why neighborhood watch lock recommendations always emphasize professional installation. A poorly aligned lock is a gift to a burglar because it often isn’t fully engaged, even when you think it is locked.
“Security is always a trade-off between convenience and protection.” – Industry Axiom
When we look at the cost of hiring a professional locksmith in 2026, we are looking at roughly $150 to $300 for a standard residential install in a major city. People balk at that price until they realize the cost of replacing a custom mahogany door frame is ten times that amount. A pro uses a dedicated boring jig. This isn’t just a plastic guide; it is a heavy-duty steel clamp that ensures the latch hole and the cylinder hole meet at a perfect 90-degree angle. Without this, you risk the ‘wandering bit’ syndrome where your holes are staggered, forcing you to ‘wallop out’ the wood to make the hardware fit. That is how you ruin a frame.
The Mechanism Zoom: Pins, Tolerances, and Shear Lines
Inside a quality deadbolt, like an ANSI Grade 1 cylinder, you have a series of stacks. Each stack contains a bottom pin (of varying lengths), a top pin (or driver pin), and a phosphor bronze spring. When you insert the correct key, the physics of the bitting lifts these pins to the shear line. This is the microscopic gap between the plug (the part that turns) and the shell (the body of the lock). In high-security cylinders, we use spool pins or serrated pins. These are ‘security pins’ designed to catch on the shear line if someone tries to pick or bump the lock. If you install your deadbolt crookedly, you are putting constant side-load on these pins. This causes the springs to fatigue and the brass to shave off, eventually leading to a lockout. I have seen countless home safe lockout recovery calls and residential failures caused simply by the lock being installed under tension. The bolt should ‘throw’ with zero resistance. If you have to pull or push on the door to get the thumbturn to move, your frame alignment is wrong.
Selecting Hardware: ANSI Grade 1 vs. The Zinc Scams
Before you even touch a drill, you must select the right hardware. Most of what you find on the shelves today is Grade 3 hardware, which is essentially pot metal. It is zinc with a thin brass plating. It looks shiny, but it has the structural integrity of a soda can. For a real ‘Fortress Upgrade,’ you want ANSI Grade 1. This grade requires the bolt to withstand ten blows of 75 foot-pounds of force and 250,000 cycles of opening and closing. This is the standard I recommend for master key systems for hotels 2026 and high-end residential projects. When you hold a Grade 1 lock, you can feel the weight of the solid steel or brass. It doesn’t rattle. The tolerances are tight, meaning there is less ‘slop’ in the mechanism, which translated to a more secure door frame because the force is distributed evenly during an attempted kick-in.
“The strength of a door is not found in the lock alone, but in the interface between the bolt and the stud.” – Security Manual 101
The Step-by-Step Professional Installation
First, determine your backset. It is either 2-3/8 inches or 2-3/4 inches. Mark your center point with a sharp awl. Do not use a pencil; a pencil line is wide and imprecise. Use a hole saw with a fine tooth count to prevent splintering. A trick I use in my shop is to drill from one side until the pilot bit just pokes through the other side, then move to the other side to finish the hole. This prevents the ‘blowout’ that ruins the veneer of the door. Once the main hole is bored, use a 1-inch spade bit for the latch hole. Now, the most critical part: the strike plate. Throw away the 1-inch screws that come in the box. They only grab the thin wood of the door jamb. You need 3-inch hardened steel screws that pass through the jamb and deep into the jack stud of the house frame. This anchors the lock to the skeleton of the building. In urban areas, where door kick-ins are the primary method of entry, this is the single most important step. Without those long screws, the deadbolt is just a fancy handle.
Weather, Humidity, and Long-Term Maintenance
Wood is a living material. It breathes. In the humid summers of the coast or the freezing winters of the Midwest, wood doors will swell and contract. This is a major factor in lock maintenance tips for winter 2026. If you install your deadbolt too tightly, the winter contraction will move the strike plate out of alignment, and you will find yourself struggling with the key. Always leave a tiny bit of ‘play’ in the strike plate hole to account for this seasonal movement. And for the love of all things mechanical, stop putting WD-40 in your locks. It is a solvent, not a long-term lubricant. It attracts dust and turns into a sticky paste that gunk up the pins. Use a dry PTFE spray or a high-quality Houdini lubricant. Graphite is okay in a pinch, but it can get messy and clumpy if overused. A well-lubricated lock installed with proper frame clearance will last thirty years.
The Economics of Professional Security
Looking at locksmith costs in urban areas 2026, you might see a rise in service fees due to specialized tools like Lishi picks and electronic programming for smart locks. However, the cost of a professional deadbolt installation remains the best insurance policy you can buy. When you hire a pro, you aren’t just paying for the thirty minutes of drilling; you are paying for the twenty-five years of knowing exactly where to drill. We see the ‘Trunk Slammers’ out there charging $29 for a service call only to tell you the lock is ‘unpickable’ and needs to be drilled out for $500. A real locksmith will almost always prefer to use non-destructive entry methods, like a Lishi tool or an air wedge, unless the lock has suffered a catastrophic mechanical failure. Trust the bench experience over the cheap price tag. Security is about the peace of mind that comes when you hear that solid ‘thunk’ of a perfectly aligned bolt sliding into a reinforced frame.
“,”image”:{“imagePrompt”:”A close-up, high-detail macro photograph of a professional locksmith’s hands using a heavy-duty steel boring jig on a solid oak door. The lighting is workshop-style, showing the texture of the wood grain and the metallic sheen of the tools. No sawdust is visible, emphasizing a clean, professional workspace.”,”imageTitle”:”Professional Deadbolt Boring Jig Installation”,”imageAlt”:”Locksmith using a steel jig to drill a deadbolt hole in a wood door”},”categoryId”:15,”postTime”:”2024-05-22 09:00:00″}
“`